Choosing the right Stainless Machine Screw begins with the job it must perform, not the shine of its head. A screw holding a light electrical cover faces different demands from one securing a pump housing near saltwater. Start with the load, vibration, temperature, moisture, and materials in contact. Then check thread size, length, head style, drive type, and installation access. Small details matter. A screw that is too short may leave too little thread engagement; one that is too long can interfere with parts behind the joint.
Stainless steel offers useful corrosion resistance, but “stainless” is not a complete specification. Common grades behave differently, and the surrounding environment can affect corrosion and galling. Fastener author John H. Bickford’s bolted-joint design principles can be paraphrased this way: “Choose the screw for the joint, not merely for its material name.” That is a guiding idea, not a verbatim quotation. Compare the screw’s grade and finish with the mating material, and follow the equipment maker’s torque guidance where available. A washer or lubricant may help in some assemblies, but either can change clamping behavior. Check compatibility before relying on it.
This guide explains how to weigh those choices without treating one grade as universally best. Look closely at the application. A quick visual match can mislead. Even experienced buyers sometimes need to revisit a specification when the real operating conditions differ from the drawing. Proper selection is a process, not a guess.
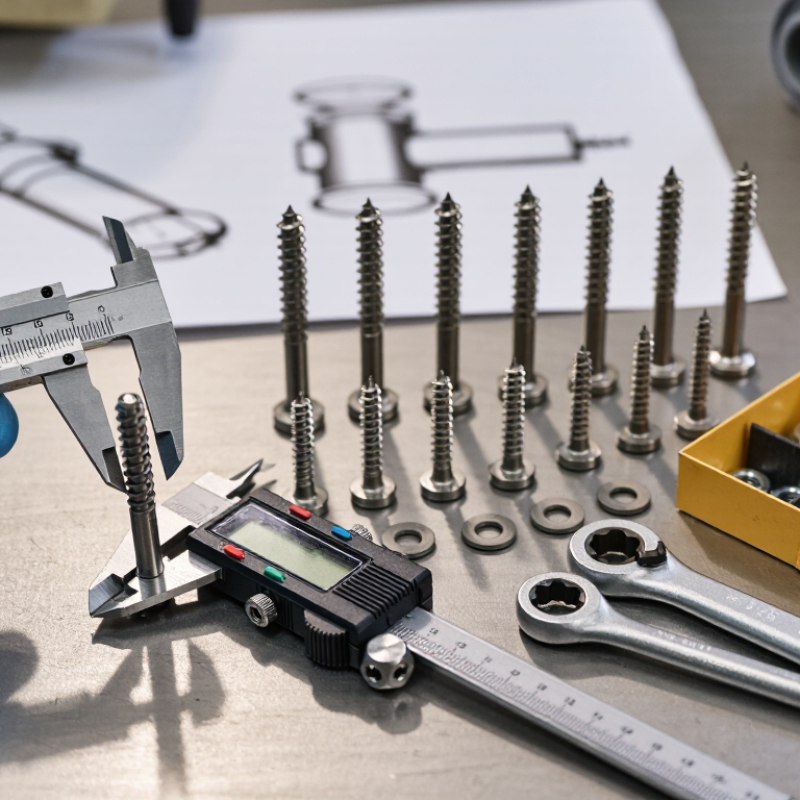
Start with the joint, not the screw bin. Record the tensile load, shear forces, vibration, and how often the assembly will be opened. A screw carrying a steady axial load faces different demands from one securing a vibrating motor cover. ISO 3506-1:2020 specifies a minimum tensile strength of 700 MPa and a minimum 0.2% proof stress of 450 MPa for A2-70 and A4-70 fasteners within the standard’s covered size range. These figures help compare grades, but they do not replace checking the actual design load, thread engagement, and screw dimensions. Small detail. Engagement matters.
Choose the alloy for the exposure, not just the label. ASTM A240/A240M specifies 2–3% molybdenum for 316 stainless steel, which generally improves resistance to chloride-related pitting compared with 304. Yet neither grade is immune to corrosion. Salt spray, trapped moisture beneath a washer, and contact with dissimilar metals can change performance. For outdoor or washdown equipment, consider drainage, crevices, and the mating material as part of the same decision.
Installation conditions count, too. Friction varies with thread finish, lubrication, and surface condition, so the same tightening torque may create different preload. Avoid assuming a torque chart fits every assembly; check the fastener specification and test a representative joint where failure would be costly. This is easy to misjudge. Revisit the choice if loads, cleaning chemicals, or service temperatures change.
Stainless steel grade selection starts with the environment, not the screw’s appearance. A screw exposed to salt spray, coastal air, or chloride cleaners may pit even when it looks sound at installation. Grade 304 suits many indoor, dry applications. For frequent salt or chemical exposure, grade 316 is often a better candidate because molybdenum improves resistance to pitting. But no grade is universally “marine-proof.” Crevices under a washer can trap moisture and salts, creating a harsher local environment than the surrounding air.
Check the actual exposure: chloride concentration, temperature, wet-dry cycles, and contact with other metals. ASTM G48 offers comparative tests for pitting and crevice corrosion, but laboratory results do not guarantee field performance. The NACE IMPACT study estimated corrosion costs at US$2.5 trillion globally in 2013, about 3.4% of global GDP; it also found that corrosion management could save 15–35% of those costs. That scale is a useful reminder: choosing a screw by price alone can be a costly shortcut. I would verify the supplier’s grade documentation and test the assembled joint when conditions are severe. A datasheet cannot reproduce every jobsite detail.
Choose the head to suit both the joint and the tool clearance. A pan head offers a broad bearing surface above the work, while a flat head sits flush when paired with a countersunk seat. A socket head can help where a narrow wrenching area is useful. Check the head diameter and height against nearby parts; a screw that clears on paper may still foul a bracket. Fit matters.
Match the drive to the assembly method. A hex socket can provide controlled turning in a recessed location, while a Phillips-style drive is common for general assembly. A slotted drive is simple, but the bit can slip if it is held at an angle. Use a properly sized driver, and start the screw by hand to reduce cross-threading. With stainless fasteners, avoid forcing a tight fit; friction can cause galling, especially during repeated assembly.
Point style depends on how the screw meets the joint. Most machine screws have a blunt point for tapped holes or nuts. A short dog point can help locate a part in a matching recess, while a cone point may suit a locating or set-screw function. Confirm the drawing or mating component before choosing; point names and dimensions can vary. One detail I would recheck is the hole depth, since a screw can bottom out before the parts clamp securely.
Choose diameter from the tapped hole or clearance-hole drawing, not by eye. A screw that is too small can wobble; one that is too large may damage the mating thread. ISO 261 specifies metric thread series, including M6 × 1.0 and M8 × 1.25 coarse pitches. Match the thread designation exactly. Fine-pitch threads are not interchangeable with coarse threads, even when their diameters match. Fit matters.
Length depends on the joint stack. Add the material thicknesses, washer thickness, and any required engagement in the tapped part. Measure from beneath the head on most pan-head screws; countersunk screws are measured over the full length. Check the drawing, though—head styles and supplier conventions can vary. A millimetre can matter in a shallow blind hole.
NASA’s Fastener Design Manual, Technical Report RP-1228, discusses fastener selection and joint design; its guidance is a useful reminder that screw length affects the joint, not just appearance. For stainless screws, also check the specified material grade and installation conditions. ASTM F593 covers stainless steel bolts, hex cap screws, and studs, but a machine-screw application may call for a different specification. Don’t assume “stainless” alone identifies the right screw. The small details are easy to miss.
Match the screw’s diameter, length, and thread type to the parts being joined. The chart shows standard coarse pitches for common ISO metric machine-screw sizes.
| Metric size | Nominal diameter | Coarse pitch |
|---|---|---|
| M3 | 3 mm | 0.5 mm |
| M4 | 4 mm | 0.7 mm |
| M5 | 5 mm | 0.8 mm |
| M6 | 6 mm | 1.0 mm |
| M8 | 8 mm | 1.25 mm |
| M10 | 10 mm | 1.5 mm |
Choosing length: Measure the material stack the screw must pass through, then allow enough thread to engage the tapped hole or nut. For most machine screws, length is measured from beneath the head; countersunk screw length is measured overall. Confirm the thread system and pitch match the mating part before installation.
A stainless machine screw can look right and still fail to fit. Match its nominal diameter, thread pitch, and length to the mating hole or nut. Check the head shape and drive recess, too; a countersunk head will not seat properly in a flat-bottomed hole. Fit matters.
Check the drawing and the applicable standard. ISO 3506 covers mechanical properties for corrosion-resistant stainless steel fasteners, while metric thread dimensions are covered by separate standards. Confirm the required grade: A2 is commonly associated with 304 stainless, and A4 with 316. These labels do not make screws interchangeable in every environment. Salt spray, cleaning chemicals, and trapped moisture can change what is suitable. A tidy parts list may still miss the real exposure.
Installation needs matter just as much. Stainless threads can gall, especially when driven quickly or dry. Start the screw by hand, keep it aligned, and use a controlled, steady speed. Follow the specified torque rather than guessing; coatings and lubricants can change clamping force. If the screw binds, stop and inspect the threads instead of forcing it. It is tempting to blame the screw, but mismatched pitch or a damaged hole may be the actual problem.
Start with the joint. Check tensile load, shear forces, vibration, opening frequency, thread engagement, and screw dimensions. Small details matter.
Grade 316 often resists chloride-related pitting better than grade 304. Neither is corrosion-proof. Check salt exposure, trapped moisture, temperature, and nearby metals.
It suits many dry indoor settings. Wet cleaning, chemicals, or frequent condensation can change the choice. I would verify the actual exposure.
Moisture and salts can collect beneath a washer. That small sheltered area may corrode faster than the surrounding surface. Drainage helps.
Not without checking the assembly. Finish, lubrication, and surface condition change friction and preload. Test a representative joint when failure would be costly.
Match the head to clearance and bearing needs. A flat head needs a countersunk seat; a socket drive can suit recessed spaces. Fit matters.
Start the screw by hand and use a correctly sized driver. Avoid forcing a tight fit, especially during repeated assembly. I might still recheck lubrication.
A blunt point commonly suits tapped holes or nuts. Dog and cone points serve locating or set-screw functions. Check the drawing and hole depth.
Choosing the right Stainless Machine Screw starts with understanding the load it must carry, the materials being joined, and the conditions where it will operate. Consider exposure to moisture, chemicals, heat, or vibration, then select a stainless steel grade suited to those demands. The right grade can help balance corrosion resistance, strength, and durability.
Next, choose a head, drive, and point style that fit the workpiece and available installation tools. Confirm the screw’s diameter, length, and thread type match the materials and provide secure engagement without causing damage. Finally, check that the screw is compatible with the mating components, applicable product standards, and installation requirements. Taking these factors into account helps ensure a dependable fit and reliable performance.

Krui Hardware